 Polski
 English
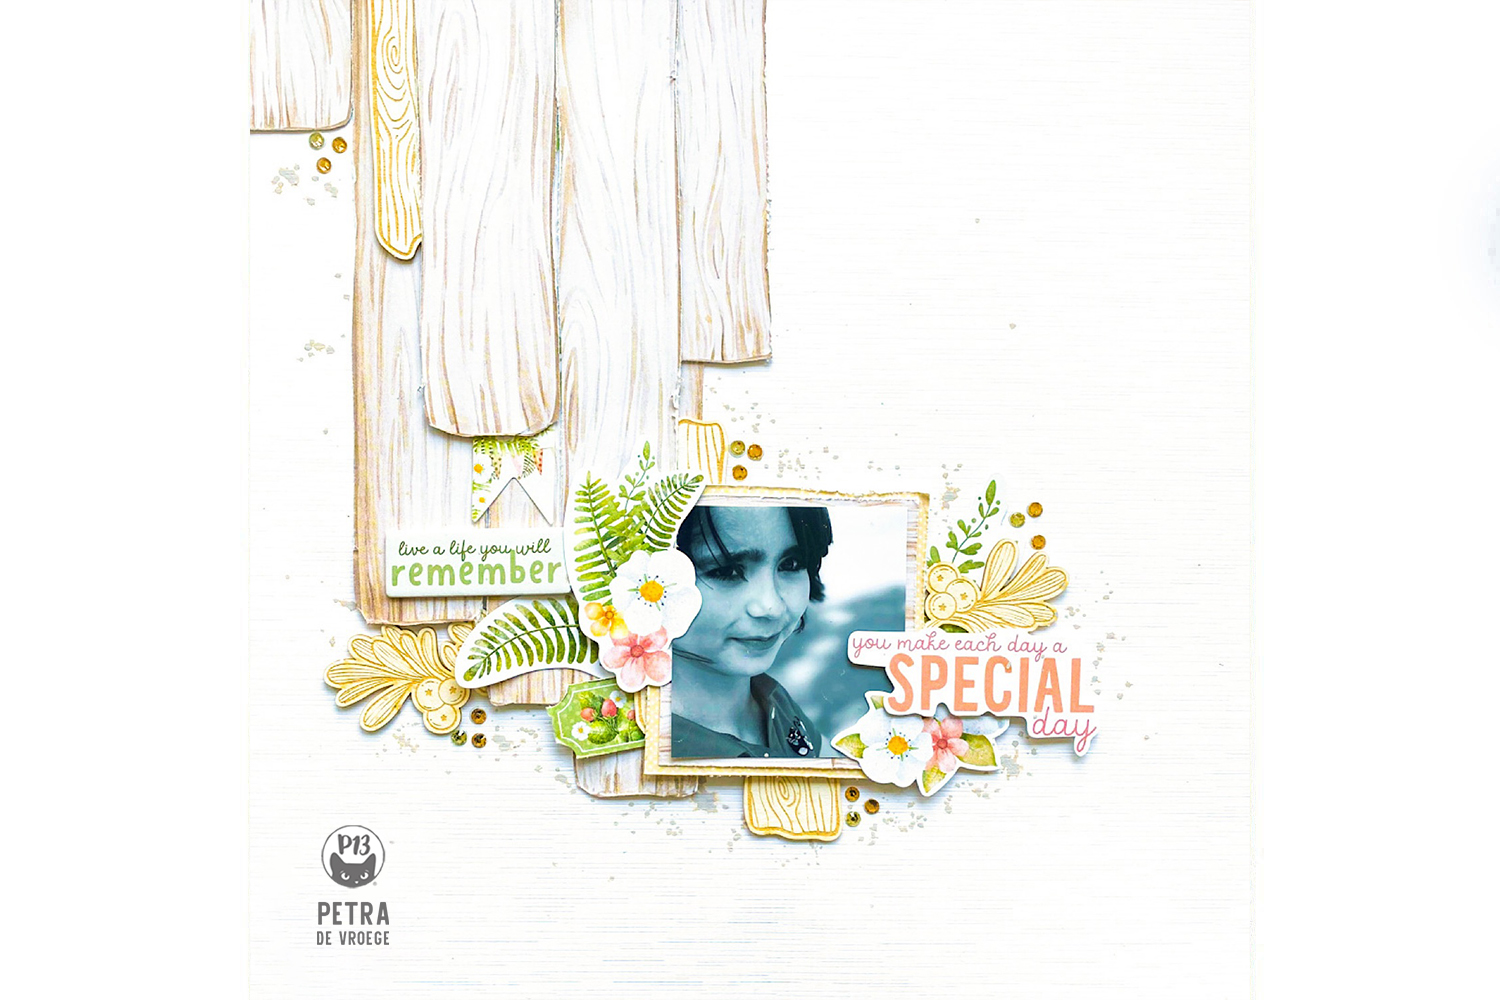
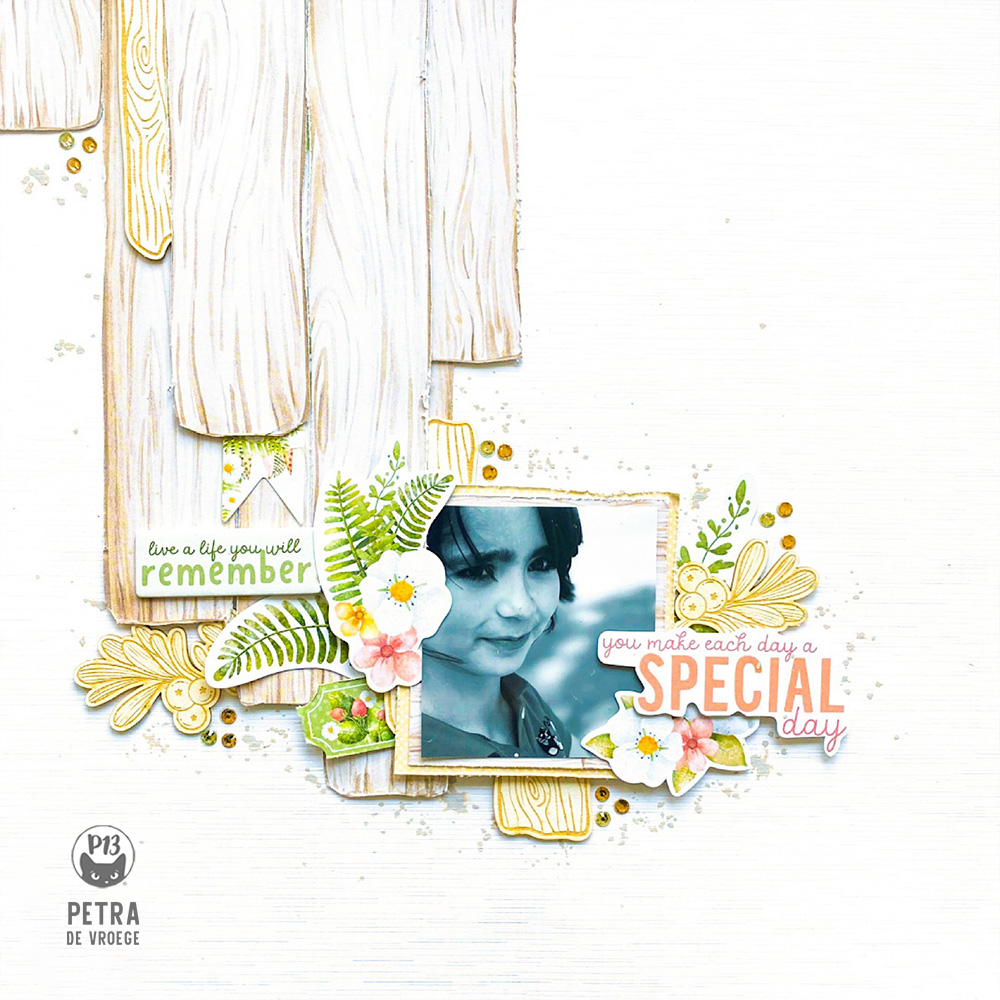
Hi Friends! So good to see you again on our blog! Today I created a layout with the gorgeous Woodland Cuties collection. This is a baby-collection, but I wanted to show you that it is so versatile! You can also easily use it for many other projects.
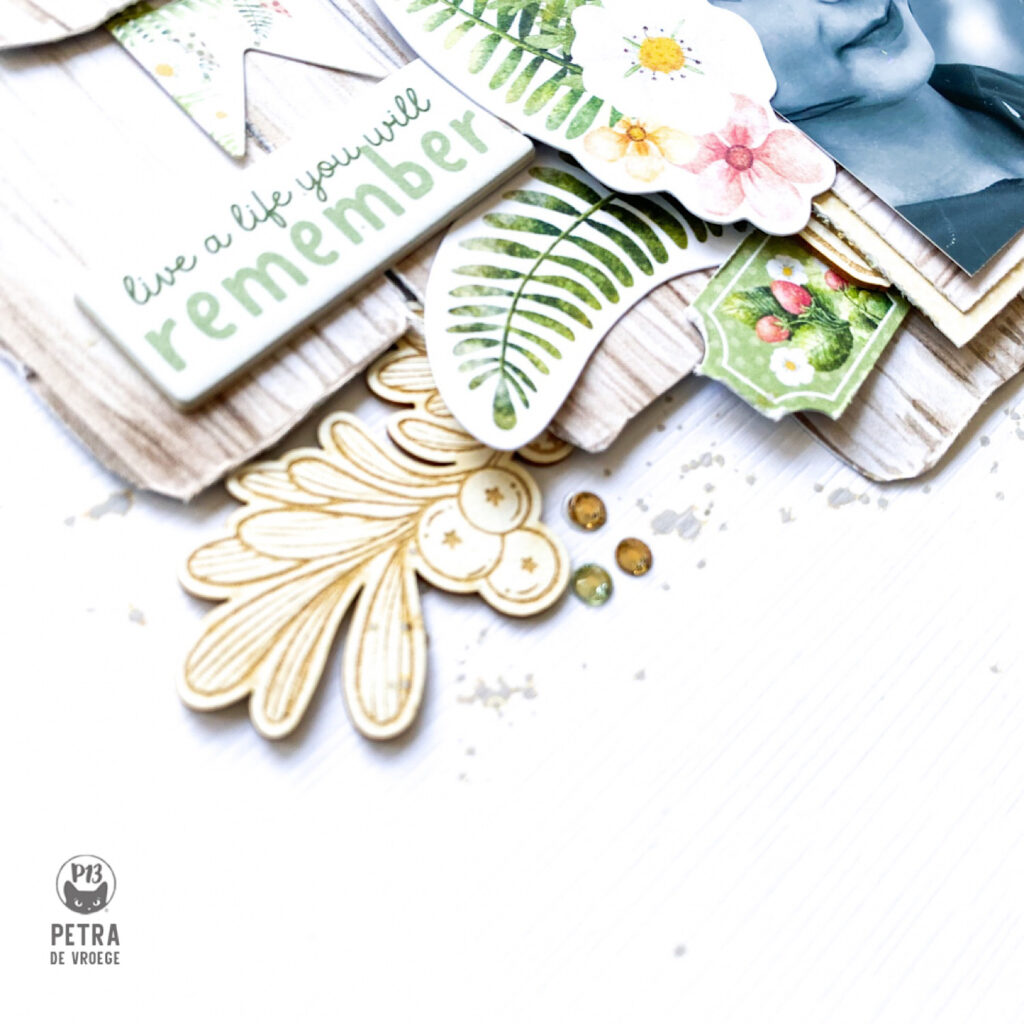
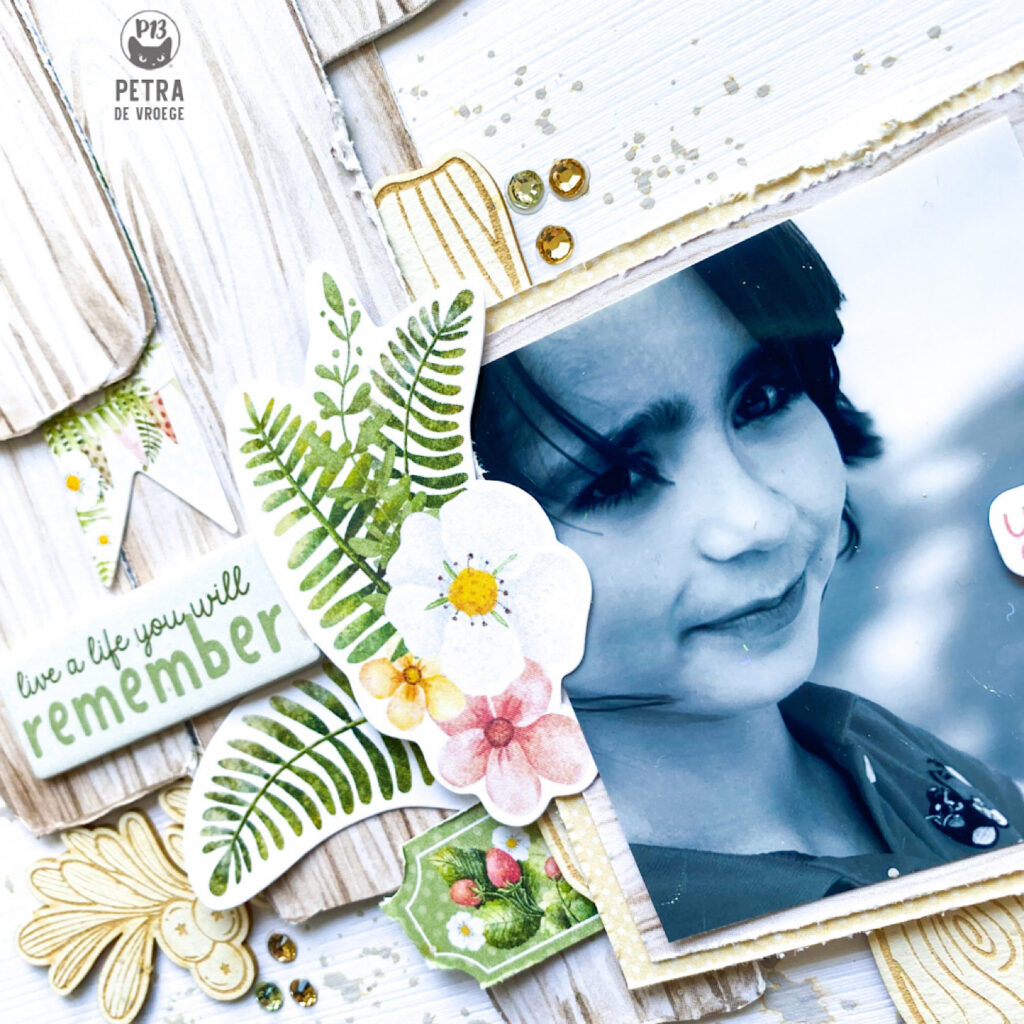
I started off with cutting apart the wooden planks and arranged them on the top of the page. I distressed the edges with a pair of scissors. I never use a distress tool (although I have one). Distressed edges give that shabby look that I love, I rarely leave a cut edge as it is… it also conceals any uneven bits so distressing is my go to when it comes to hand cut edges. I tucked some of the light chipboard wooden planks between the paper ones, just for a bit more dimension and I love using different structures in my work. After placing all the wooden planks it was time to place the photo and embellish around it. I backed the photo with matching design papers from the collection. Again, I cut the edges by hand so I distressed the edges.
Usually I work with large, bold titles, but this time I decided not to. The printed words in the collection are so pretty that I had to use them, and decided to use them as a title for my page. The flowers in the collection are just too cute! Love the colors! I finished it off with some of the light chipboard berry branches.
Some splatters of matching paint (I used oxide spray) and some sparkle from a few little gems here and there and it’s a wrap! I hope you like it, if you have any questions, please let me know! Would you like to create with me? Here
is the video process for this project.
 .
.
I used:

Regards,
